
Understanding What Causes Kitchen Sink Clogs
When your kitchen sink won't drain properly, it's usually the result of one or more common culprits that accumulate over time. Understanding these causes helps you prevent future clogs and choose the right solution for your specific situation.
Grease and fats are the leading cause of kitchen drain blockages. When you pour hot grease down the drain, it may seem harmless initially, but as it cools, it solidifies inside your pipes. This creates a coating on pipe walls that traps other debris, forming thick blockages that worsen over time. Hot water may push grease temporarily but doesn't fully eliminate it, leading to recurring drainage problems.
Food scraps create another major problem, especially starchy items like pasta, rice, potatoes, beans, and coffee grounds. These materials absorb water and expand inside pipes, creating a paste-like obstruction that blocks water flow. Even with a garbage disposal, fibrous foods like celery, eggshells, and banana peels can compact and create stubborn blockages. Coffee grounds are particularly problematic because they don't break down and instead accumulate like sediment.
Soap buildup combines with hard water minerals to form scum that gradually narrows your pipes. Modern liquid soaps containing fats are especially prone to causing this issue. The residue catches other debris flowing through the drain, exacerbating clogs from food and grease. Over time, this accumulation slows drainage and creates a sticky surface for other materials to adhere to.
Other less common causes include foreign objects like utensils or small toys that accidentally fall into the drain, hair from washing dishes or cleaning, and even tree roots that invade older pipes through cracks or joints. If you're experiencing recurring clogs despite addressing the common causes, deeper structural issues may be at play, and a hydro jetting service or camera inspection could be worth considering.

Find Trusted & Licensed Plumbers in Ohio
Get matched with companies for your specific needs
Proven DIY Methods to Unclog Your Kitchen Sink
When you discover your kitchen sink clogged, several effective DIY methods can restore proper drainage without calling a plumber. Start with the simplest approaches first, then progress to more intensive methods if needed. Having a few essential plumbing tools on hand makes the job much easier.
The Plunging Technique
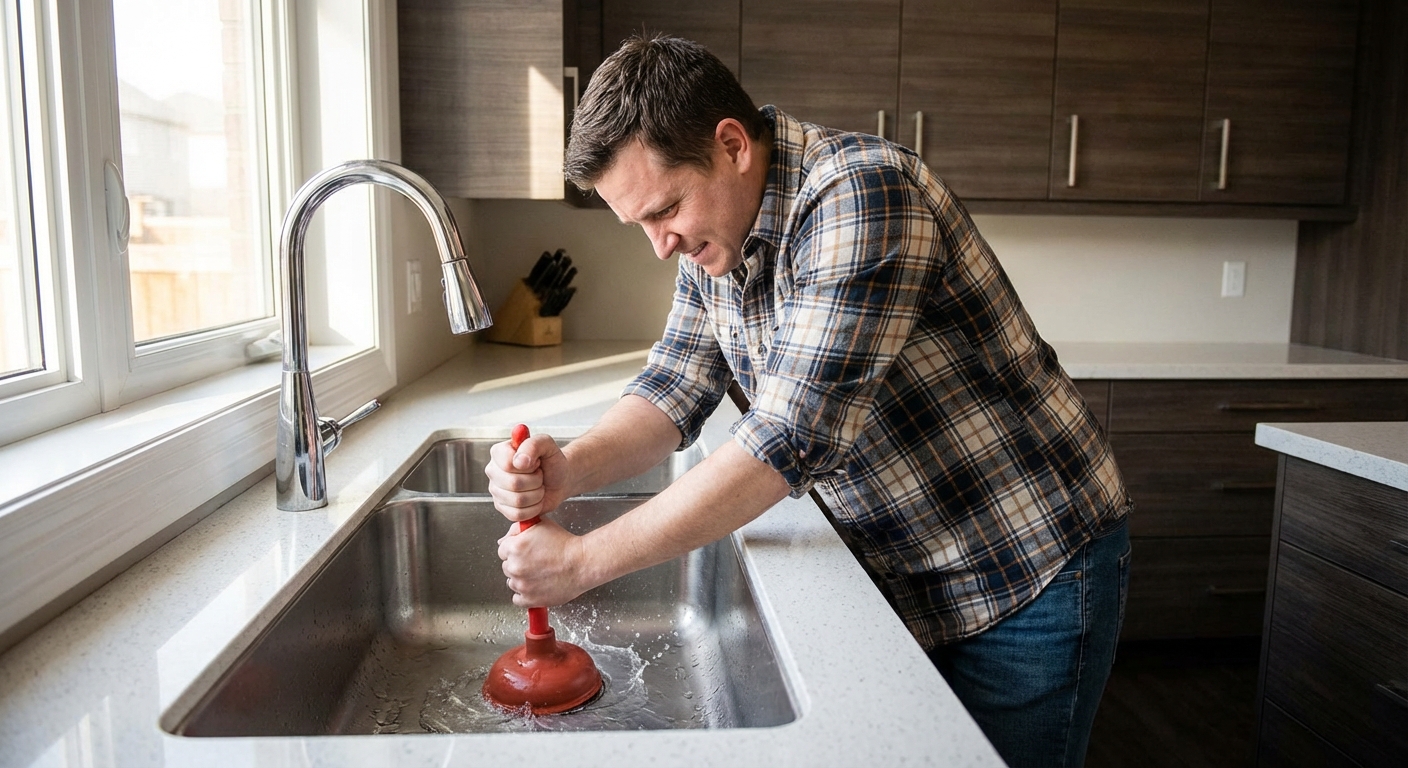
Plunging is often the quickest solution for dislodging clogs caused by grease or food debris. To use this method effectively, partially fill the sink with 3-4 inches of water to create a proper seal. Place the plunger firmly over the drain opening and plunge vigorously up and down 15-20 times, then pull it off quickly to break the suction.
For double sinks, cover the adjacent drain with a wet rag or stopper to maintain pressure in the clogged line. Continue plunging for several minutes until water drains freely. This method works best after removing standing water and is particularly effective for minor to moderate blockages near the drain opening.
Baking Soda and Vinegar Solution
This natural kitchen sink clog home remedy creates a fizzing chemical reaction that loosens grease, soap scum, and organic buildup without harsh chemicals. Start by removing standing water from the sink, then pour ½ to 1 cup of baking soda directly down the drain. Immediately follow with ½ to 1 cup of white vinegar. You'll see and hear the mixture foam as it works.
Cover the drain with a stopper or wet cloth and let the solution sit for 15-60 minutes, depending on the clog's severity. For tougher blockages, leave it for up to an hour. Flush the drain with a pot of hot water (or boiling water if you have metal pipes, but avoid boiling water on PVC pipes as it can damage them). This method is safe for most plumbing systems and effective for regular maintenance.
Cleaning the P-Trap
The P-trap is the U-shaped pipe beneath your sink that traps debris before it reaches your main drain line. When other methods fail, this is often where the blockage resides. Place a bucket underneath to catch water, then use a wrench or screwdriver to loosen the slip nuts connecting the P-trap to the drain pipes.
Remove the P-trap and clean out any accumulated debris, grease, or food particles. Check the pipe for cracks or damage while it's removed. Thoroughly clean the inside with a brush, reassemble the P-trap securely, and test with running water. If you suspect deeper venting or slope issues, review plumbing drain slope requirements to rule out structural problems.
Using a Drain Snake
A drain snake (also called a plumber's snake or auger) physically breaks up deep clogs that other methods can't reach. Insert the snake into the drain opening (or through the P-trap opening if you've removed it) and crank the handle to advance it through the pipe. When you feel resistance, twist and push to break up the obstruction.
Slowly withdraw the snake, cleaning off debris as you pull it out. For stubborn kitchen sink clogged with grease situations, you may need to repeat this process several times. Professional-grade snakes can reach 25-50 feet into your drain line, while basic homeowner models typically extend 15-25 feet, which is sufficient for most household clogs.
Special Situations: Double Sinks and Garbage Disposals
Certain kitchen configurations require modified approaches when dealing with drainage problems. Understanding these special cases ensures you address the problem effectively without causing damage.
Handling Double Sink Clogs
When your double sink clogs on both sides, it indicates the blockage is in the shared drain line beyond where the two basins converge. Start by checking the garbage disposal (if present on one side), as this is often the culprit. Cut power to the disposal at the breaker, then use a wooden spoon handle or tongs (never your hand) to remove stuck food scraps from inside.
To clear both sides effectively, try the baking soda and vinegar method down each drain simultaneously. Pour 1 cup of baking soda down each side, wait 30 minutes, then add ½ to 1 cup of vinegar to each drain. The foaming action helps dissolve grease and food buildup throughout the shared pipe system.
When plunging a double sink, work one side at a time. Plug the disposal-side drain with a wet rag or stopper, seal the plunger over the other drain, and plunge vigorously 10-15 times. Switch sides and repeat. This concentrated pressure helps dislodge clogs in the common drain line that serves both basins.
Garbage Disposal Considerations
A kitchen sink clogged on the disposal side requires extra caution due to the grinding mechanism and electrical components. Before any work, flip the breaker or unplug the unit to prevent accidental activation. Common disposal clogs occur from fibrous vegetables like celery, expandable foods like pasta and rice, or hard items like bones and fruit pits.
If the disposal hums but won't run, it's likely jammed rather than clogged. Remove visible debris, then use the Allen wrench (usually attached to the unit) to manually rotate the blades from the bottom. Press the reset button and test with cold water running. For deeper troubleshooting, our garbage disposal repair guide walks through every major failure mode and when replacement makes more sense than repair.
Avoid putting coffee grounds, eggshells, potato peels, and grease through your disposal. These materials either don't grind properly or contribute to downstream clogs. Always run cold water for 15-30 seconds before and after using the disposal to help flush debris through the system. For more complex plumbing connections involving multiple appliances, understanding dishwasher plumbing connections can help troubleshoot backup issues.
When Both Sinks Back Up Simultaneously
If water backs up in both basins whenever you run either faucet, the blockage is definitely in the shared drain line. This situation often requires more aggressive intervention. Start with the P-trap removal and cleaning, as this common junction point collects debris from both sinks.
If cleaning the P-trap doesn't resolve the issue, use a drain snake through one of the drain openings to reach the main line. Feed the snake as far as possible, typically 15-25 feet, to break up clogs in the shared pipe. Stubborn blockages that resist home remedies may require professional hydro-jetting to scour the pipe walls clean.
Chemical Drain Cleaners: Safety and Alternatives
Chemical drain cleaners promise quick solutions but come with significant risks that homeowners should carefully consider before use. Current 2026 best practice treats caustic and acid-based cleaners as a last resort, favoring enzyme-based or non-corrosive PVC-safe products and mechanical methods first.
When Chemical Cleaners May Be Acceptable
Chemical drain cleaners should only be considered as a last resort for minor, stubborn clogs after natural methods fail. If you must use them, ensure your pipes are modern PVC or compatible materials, and look for products clearly labeled "safe for PVC, ABS, and copper." Avoid harsh formulas on older metal, corroded, or aging PVC pipes that may soften from the heat these chemicals generate.
Use them only for partial clogs in sinks without garbage disposals, never in toilets or fully blocked drains where standing water prevents proper dilution. Never leave chemical cleaners sitting overnight, as prolonged contact increases pipe damage risk. Avoid them entirely if you have a septic system, as they kill the beneficial bacteria needed for waste breakdown.
When using any chemical cleaner, wear gloves and safety goggles, ensure adequate ventilation, and never mix different products. Combining chemicals (especially with bleach) can release deadly gases like chlorine. Overusing harsh chemicals is one of the most common plumbing mistakes homeowners make, often turning a minor clog into a major pipe repair.
Risks of Chemical Drain Cleaners
Chemical cleaners containing sodium hydroxide, sulfuric acid, or oxidizing agents pose multiple dangers that often outweigh their convenience. They generate intense heat that can crack porcelain, soften PVC pipes, or corrode metal pipes, leading to leaks and expensive repairs. The corrosive action weakens pipe integrity over time, even if immediate damage isn't visible.
Health hazards include toxic fumes that irritate eyes, throat, and lungs, plus severe burns from splashes on skin. The residue remains in drains and poses ingestion risks to children and pets. Environmental impact is significant, as these chemicals pollute waterways and harm ecosystems after treatment plants fail to fully filter them.
Safer Alternative Solutions
Natural and mechanical alternatives provide effective clog removal without the risks of harsh chemicals. Enzyme-based drain cleaners like Green Gobbler and Bio-Clean use bacteria and enzymes to digest organic matter slowly but safely. They're biodegradable, non-toxic for pipes and septic systems, and ideal for routine maintenance rather than emergency clogs. They work gradually over hours, so dose them at night when water won't be running.
The baking soda and vinegar method mentioned earlier remains one of the safest and most effective home remedies. For immediate results without chemicals, very hot tap water can dissolve grease clogs in metal pipes (use 120-140°F water for PVC). Regular use of this simple technique as preventive maintenance keeps drains flowing freely.
Mechanical tools like plungers, drain snakes, and wet/dry vacuums physically remove blockages without introducing any substances into your plumbing. While requiring more effort, these methods address the actual obstruction rather than attempting to dissolve it. Persistent issues that masquerade as clogs are sometimes low water pressure problems or venting issues that chemicals will never resolve. Proper diagnosis saves money and prevents unnecessary pipe damage.
Prevention Strategies to Keep Your Drains Clear
Preventing kitchen sink clogs is far easier and less expensive than dealing with them after they occur. Implementing these proven strategies can dramatically reduce your clog risk while extending your plumbing's lifespan. A solid preventive plumbing maintenance routine pays for itself many times over.
Proper Grease Disposal Methods
Never pour grease, oils, or fats down your kitchen sink. This single habit prevents the majority of kitchen drain clogs. When cooking with fats, let them cool in the pan, then pour into a sealed container (old coffee cans or glass jars work well) and dispose of in your trash. For small amounts, wipe pans with paper towels before washing.
Bacon grease, cooking oils, butter, and meat fats all solidify at room temperature, creating the coating inside pipes that catches other debris. Even when mixed with hot water and soap, these fats still cause problems downstream as they cool. Consider keeping a designated grease container near your stove to make proper disposal convenient.
Installing and Using Drain Screens
Mesh drain strainers cost $5-15 and provide your first line of defense against food particles entering your pipes. Choose stainless steel screens with fine mesh that catches even small debris while allowing water to flow freely. Install one in each sink basin, including the disposal side.
Before washing dishes, scrape large food scraps into the trash or compost bin. Don't rely on your disposal or drain screen to handle everything. Clean your strainers after each use, removing trapped debris before it decomposes or creates odors. This simple habit takes seconds but prevents hours of unclogging work later.
Regular Maintenance Routines
Weekly hot water flushes help maintain clear drains. After doing dishes, run hot tap water (or pour a kettle of hot water down metal pipes) for 1-2 minutes to melt and flush away any grease or soap residue. This simple practice prevents gradual buildup that leads to major clogs.
Monthly, perform a preventive baking soda and vinegar treatment, or dose an enzyme cleaner like Green Gobbler. Pour 1-2 cups of baking soda down the drain, follow with vinegar, let it fizz for 15 minutes, then flush with hot water. This dissolves minor accumulations before they become problematic. Schedule this maintenance on the first of each month so you don't forget.
Every few months, remove and clean your P-trap even if you don't have a clog. This proactive approach removes accumulated debris before it causes drainage problems. While you have the P-trap off, inspect it for cracks, corrosion, or loose connections that could cause leaks, similar to maintaining other plumbing fixtures to prevent issues like broken toilet flanges.
Garbage Disposal Best Practices
If you have a garbage disposal, follow these rules to prevent clogs. Run cold water for 15-30 seconds before, during, and after grinding food. Cold water solidifies fats so they're chopped up and flushed through rather than coating pipes as liquid. Feed food gradually rather than cramming large amounts at once.
Avoid putting fibrous vegetables (celery, asparagus, corn husks), starchy foods (pasta, rice, potatoes), expandable foods (beans, bread), hard materials (bones, fruit pits, nuts), or grease through your disposal. Coffee grounds and eggshells should also go in the trash, as they don't grind properly and accumulate in pipes.
Clean your disposal monthly by grinding ice cubes to scrape away buildup, followed by citrus peels to eliminate odors. Some homeowners freeze vinegar in ice cube trays for a cleaning and deodorizing combination. If you notice your kitchen sink gurgling when draining, this indicates air trapped by partial blockages. Address it immediately before it worsens.
When to Call a Professional Plumber
While many kitchen sink clogs respond well to DIY methods, certain situations require professional expertise to avoid costly damage or safety hazards. Knowing when to call a plumber saves you time, money, and potential plumbing disasters.
Signs You Need Professional Help
Call a plumber if you've tried multiple DIY methods without improvement after 24 hours. Persistent clogs despite plunging, snaking, and natural cleaners indicate deeper blockages in your main drain line that require professional equipment like motorized augers or hydro-jetting systems.
Multiple fixtures backing up simultaneously, such as your kitchen sink, bathroom drains, and toilets all experiencing slow drainage, suggests a main sewer line blockage. This serious issue requires immediate professional attention and often a camera inspection to locate the obstruction. Tree roots invading sewer lines, collapsed pipes, or significant buildup require specialized equipment beyond homeowner capabilities.
Sewage odors coming from your drain indicate venting problems or sewer line issues that pose health hazards. Gurgling sounds from multiple drains simultaneously, water pooling around floor drains, or sewage backing up into lower fixtures all signal serious problems. Refer to our emergency plumber decision guide to determine whether your situation needs an urgent same-day call.
2026 Cost Considerations
Professional kitchen sink unclogging typically costs $100-$275 for basic snaking service during business hours, with most jobs averaging around $200-$240 in 2026. More complex issues requiring hydro-jetting run $350-$500 for a typical kitchen branch line, with heavy grease buildup or main line work pushing costs toward $600-$1,400. Camera inspection adds $200-$400 but provides valuable information about pipe condition and exact blockage location.
Emergency after-hours service typically adds $100-$300 on top of standard rates, so calling during business hours when possible saves significantly. Many plumbing companies offer flat-rate pricing rather than hourly rates, providing cost certainty before work begins. Ask about warranties on their work, since reputable plumbers guarantee their repairs for 30-90 days. For a full breakdown of what you should expect to pay, our plumbing service cost guide covers every common repair.
Compare quotes from 3-4 licensed, insured plumbers before selecting one for non-emergency work. Check online reviews, verify licensing with your state board, and confirm they carry liability insurance. If your repair bill is large, our guide to plumbing financing options covers loans and payment plans that can make the cost manageable.
Preventing Future Plumber Calls
Once a professional resolves your clog, ask them to identify the root cause and recommend prevention strategies. They may spot issues like pipe slope problems, undersized drain lines, or fixture installation errors that contribute to recurring clogs. Addressing these underlying issues prevents repeat problems.
Schedule annual plumbing inspections as preventive maintenance, especially for homes over 25 years old. Older homes often have hidden issues described in our guide on old house plumbing problems, from corroded pipes to outdated venting. Plumbers can camera-inspect your main lines, check for early signs of corrosion or root intrusion, and perform preventive cleaning before clogs form. This proactive approach costs $100-200 annually but prevents $500-2,000+ emergency repairs.
Frequently Asked Questions
How long does it take to unclog a kitchen sink with baking soda and vinegar?
The baking soda and vinegar method typically requires 15-60 minutes of contact time depending on the clog's severity. For minor buildup and regular maintenance, 15-30 minutes is usually sufficient. Tougher grease clogs or significant blockages may need the full hour for the chemical reaction to break down the obstruction. After the waiting period, flush with hot water and test drainage. If it's still slow, repeat the process or try a more aggressive method like plunging or snaking.
Can I use a plunger on a kitchen sink with a garbage disposal?
Yes, you can safely plunge a kitchen sink with a garbage disposal, but take precautions to avoid damage. Ensure the disposal is turned off before plunging to prevent accidental activation. If you have a double sink with the disposal on one side, plug the disposal drain with a wet rag when plunging the other side to maintain proper pressure. Vigorous plunging won't harm the disposal unit, but avoid using chemical drain cleaners in disposal-equipped sinks as they can corrode the metal components.
Why does my kitchen sink keep clogging even after I clear it?
Recurring clogs typically indicate an underlying problem that quick fixes don't address. Common causes include inadequate pipe slope that prevents proper drainage, grease accumulation deeper in the line that reforms after each clearing, or improper use of the garbage disposal allowing food to compact downstream. Tree roots invading older pipes, corrosion creating rough surfaces that catch debris, or undersized drain lines for modern usage patterns also cause repeat problems. A professional camera inspection can identify the root cause and recommend permanent solutions.
Is it safe to pour boiling water down a kitchen sink drain?
Boiling water is safe for metal pipes but can damage PVC plumbing, which is common in modern homes. PVC pipes can soften or warp when exposed to temperatures above 175°F, potentially causing leaks or joint failures. If you're unsure of your pipe material, use very hot tap water instead, typically 120-140°F, which is hot enough to melt grease without risking pipe damage. Never pour boiling water down drains connected to garbage disposals, as it can damage seals and plastic components.
How much does it cost to have a plumber unclog a kitchen sink in 2026?
Professional kitchen sink unclogging typically costs $100-$275 for standard drain snaking during business hours, with most jobs averaging around $200-$240. More complex situations requiring hydro-jetting to remove stubborn grease or root intrusions run $350-$500 for a typical kitchen branch line, though heavy buildup can push that to $600 or more. Camera inspection to locate and diagnose the blockage adds $200-$400. Emergency after-hours service typically adds $100-$300 to your bill. DIY methods cost $10-$50 for supplies, making them attractive first attempts before calling professionals.