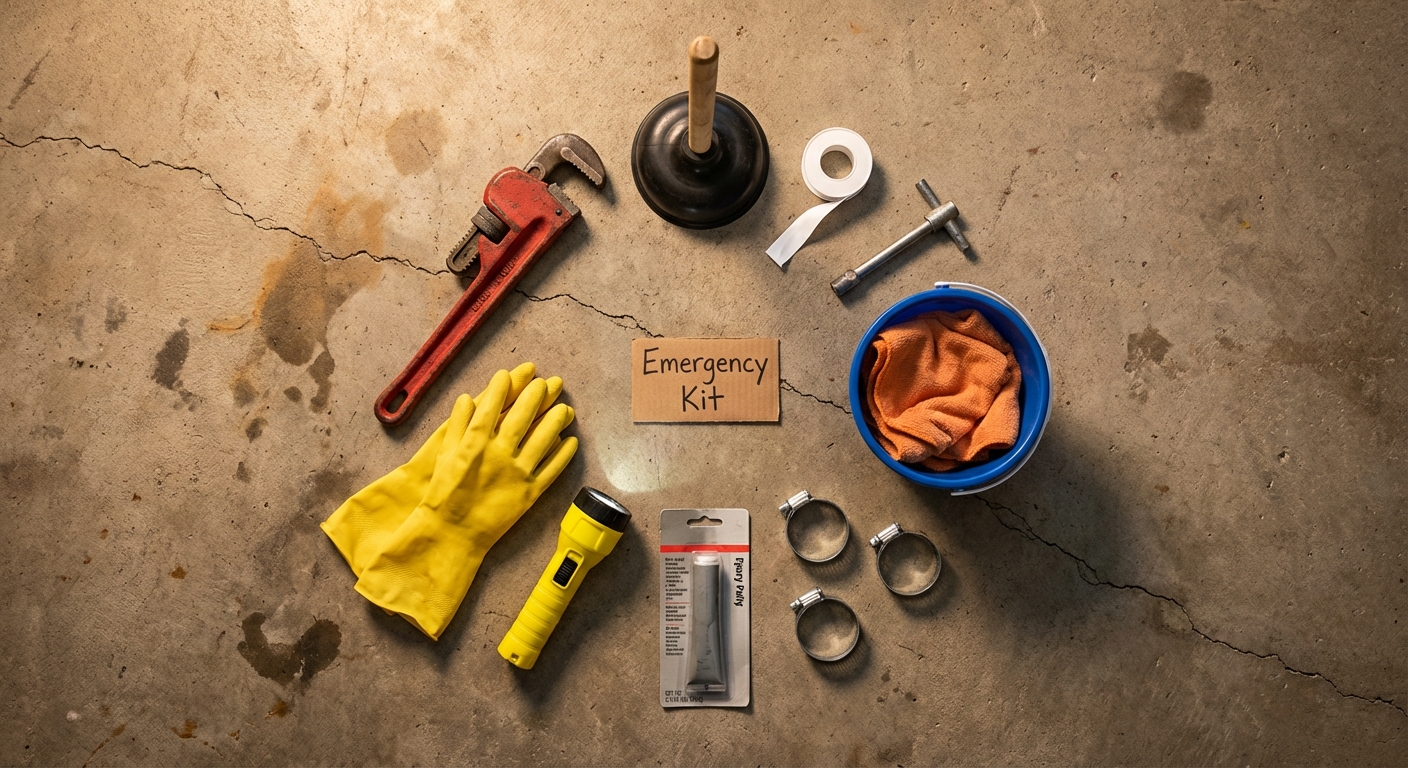
Why Every Homeowner Needs an Emergency Plumbing Kit in 2026
A burst pipe at midnight. A backed-up toilet before guests arrive. A slow leak that suddenly becomes a flood. Plumbing emergencies don't wait for convenient moments, and when they hit, having the right tools on hand can be the difference between a quick fix and thousands of dollars in water damage. Every item below has a specific role in protecting your home, your wallet, and your sanity.
Burst or leaking pipes, major drain clogs, overflowing toilets, water heater leaks, and sewer line backups remain the most common home plumbing emergencies in 2026, according to recent industry data. Flexible supply line failures on toilets, faucets, and washing machines are also one of the top causes of sudden indoor flooding. Pipe repair costs range from about $500 for an easily accessible pipe to $10,000 or more if the break is behind walls or causes extensive water damage, and a failing sump pump can leave you facing $10,000 to $25,000 in basement flooding cleanup. A properly stocked kit lets you handle the small stuff and buy time on the big stuff. For a full walkthrough of what to do the moment disaster strikes, see our plumbing emergency guide.

Find Trusted & Licensed Plumbers in Ohio
Get matched with companies for your specific needs
Core Shut-Off & Containment Tools
These are your first line of defense when water is actively flowing where it shouldn't be. Reach for these items before anything else.
| # | Item | Primary Use | Estimated Cost (2026) |
|---|---|---|---|
| 1 | Main Shut-Off Key (Curb Key) | Shuts off water at the street meter | $12 to $25 |
| 2 | Adjustable Wrench | Turns indoor shut-off valves, tightens connections | $15 to $35 |
| 3 | 5-Gallon Bucket | Catches water, stores the entire kit | $8 to $15 |
| 4 | Old Towels / Rags (x6) | Absorbs water, protects floors | $5 to $10 |
1. Shut-Off Key (Curb Key)
This T-shaped metal tool fits over the valve inside the underground water meter box near your curb. In a major emergency (burst pipe, flooding, or a valve that won't budge), it lets you cut water to the entire house from the street. Turn clockwise to shut off, counterclockwise to restore. Every adult in your household should know where this key is stored and how to use it. For a deeper look at locating and operating this critical valve, see our main water shut off valve guide.
2. Adjustable Wrench
Handles shut-off valves under sinks and behind toilets. Use it to tighten loose supply line connections that are dripping. Finger-tight plus a quarter turn is usually all you need.
3. Bucket
A 3- to 5-gallon bucket does double duty: it catches dripping or gushing water during a repair, and serves as the container for the entire kit when not in use.
4. Towels & Rags
Keep at least six old towels dedicated to your kit. They're essential for drying a pipe surface before applying epoxy putty or tape, and for soaking up standing water fast to prevent floor damage.
Repair & Sealing Supplies
Once the water is controlled, these supplies let you make temporary (or in a few cases, semi-durable) fixes on common plumbing issues.
| # | Item | Primary Use | Estimated Cost (2026) |
|---|---|---|---|
| 5 | Plumber's Tape (Teflon Tape) | Seals threaded pipe connections | $2 to $5 |
| 6 | Epoxy Putty | Fills pinholes and cracks in pipes | $8 to $15 |
| 7 | Pipe Repair Clamps | Seals longer splits on straight pipe sections | $12 to $30 |
| 8 | Self-Fusing Silicone Tape | Wraps around active leaks and irregular fittings | $8 to $15 |
| 9 | Pipe Wrench | Grips and turns stubborn threaded pipes | $20 to $45 |
5. Plumber's Tape (Teflon Tape)
Wrap this white waterproof tape clockwise around the threads of any pipe fitting before reassembly. It creates a watertight seal and is one of the most-used items in any plumber's toolkit. It's ideal for fixing slow drips at showerhead connections, supply lines, and faucet fittings.
6. Epoxy Putty
Epoxy putty is your go-to for pinholes or small cracks. Shut off the water, dry the pipe completely, then knead the two-part putty until it's a uniform color (about 1 to 2 minutes). Press it firmly over the leak, extending 1 to 2 inches beyond the damage, and mold it for at least 3 minutes to ensure adhesion. In 2026, PC Products' 4 oz. PC-Plumbing Putty Epoxy runs about $7.99 at Home Depot and cures in about 60 minutes, while J-B Weld WaterWeld (2 oz.) is around $7.99 as well. Both bond to copper, PVC, PEX, and galvanized pipes.
7. Pipe Repair Clamps
For larger splits on straight pipe sections, a repair clamp provides a stronger, faster seal. Pipe repair clamps use a metal band and a rubber gasket secured with bolts to temporarily repair a leak along the length of a pipe. Position the rubber gasket over the leak, wrap the metal band around the pipe, and tighten the bolts evenly. Don't overtighten, since crushing weakened pipe walls can worsen damage. For extra strength, apply epoxy putty first, let it partially set, then install the clamp over it.
8. Self-Fusing Silicone Tape
A newer must-have that many pros now recommend. Self-fusing silicone tape bonds to itself (not to the pipe), so it forms a solid silicone sleeve around the leak with no cure time and no adhesive. Industrial-grade versions can seal at pressures up to roughly 160 psi, and properly applied outdoor plumbing wraps often last 5 to 8 years before needing replacement. It's especially handy for irregular fittings, hose connections, and slow active leaks where putty or clamps don't sit neatly.
9. Pipe Wrench
A 14-inch pipe wrench gives you the leverage to grip and turn stubborn threaded pipes and fittings that an adjustable wrench can't budge. Use it carefully, since too much force can crack fittings or damage pipes.
Clog & Drain Tools
Clogs are the most common plumbing emergency homeowners face. These three items handle the vast majority of them.
| # | Item | Primary Use | Estimated Cost (2026) |
|---|---|---|---|
| 10 | Flange Plunger | Clears toilet clogs | $15 to $30 |
| 11 | Cup Plunger | Clears sink and tub drain clogs | $8 to $15 |
| 12 | Drain Snake / Auger (25 ft.) | Breaks up deep or stubborn clogs | $25 to $65 |
10 & 11. Plungers (Two Types)
Most homeowners have one plunger. You actually need two. A flange plunger (with the rubber extension at the bottom) seals properly in a toilet bowl. A cup plunger (flat bottom) creates the right seal in a flat sink or tub drain. Using the wrong type significantly reduces your effectiveness, and misusing plungers is one of the top common plumbing mistakes homeowners make.
12. Drain Snake / Auger
When a plunger can't clear a clog, a 25-foot hand-crank drain snake can reach blockages deep in the line. Feed it into the drain, rotate the handle when you hit resistance, and pull back to break up or extract the obstruction. Understanding the essential plumbing tools every homeowner should own will help you use a drain snake more confidently and effectively.
Safety & Visibility Gear
Never underestimate this category. Plumbing emergencies often involve unsanitary water, low-light spaces, and sharp materials.
| # | Item | Primary Use | Estimated Cost (2026) |
|---|---|---|---|
| 13 | Rubber Gloves + Safety Goggles | Protects hands and eyes from wastewater | $8 to $18 |
| 14 | LED Flashlight or Headlamp | Illuminates dark crawl spaces, under sinks | $12 to $30 |
| 15 | Multi-Bit Screwdriver Set | Removes access panels, fixture covers | $10 to $22 |
13. Rubber Gloves & Safety Goggles
Wastewater from sewer backups and toilet clogs can carry harmful bacteria. Heavy-duty waterproof gloves plus splash goggles are cheap insurance and protect you during cleanup. Keep two pairs of gloves in the kit.
14. LED Flashlight or Headlamp
A hands-free headlamp is worth its weight in gold when you're wedged under a sink trying to tighten a supply line in the dark. Keep fresh batteries in the kit, or opt for a rechargeable model and check it monthly.
15. Screwdrivers
A multi-bit screwdriver with both flathead and Phillips tips reduces bulk in your kit while covering nearly every fixture cover and access panel you'll encounter.
Smart Additions Worth Considering in 2026
Beyond the classic 15 items, modern homeowners are increasingly adding smart tools that catch leaks before they become disasters. These aren't strictly required, but they can pay for themselves after a single prevented emergency.
- Smart leak detectors ($20 to $50 each): Wi-Fi sensors like the First Alert L1 (PCMag's top 2026 pick) and the D-Link SW-A11KT (Wirecutter's current top pick) sit under sinks, near the water heater, and behind toilets, sending phone alerts and sounding a siren the moment they detect moisture. The SwitchBot WiFi Water Sensor adds top-and-bottom sensing with a 2-year battery life.
- Automatic smart shutoff valves ($400 to $700 installed): Motorized valves like the Flo by Moen Smart Water Shutoff close your main line the instant a paired sensor detects water. Especially valuable if you travel often or own a second home.
- Push-to-connect couplings and end caps (SharkBite-style): Let you cut out a bad section of copper, CPVC, PEX, or PE-RT and reconnect it without soldering or glue. In 2026, a ½ in. SharkBite Max coupling runs about $9.36 at Home Depot, end stops start around $6.58 each, and tees start near $11.44. Keep ½ in. and ¾ in. sizes on hand.
- Water pressure gauge ($10 to $20): Screws onto a hose bib. Pressure above 80 psi accelerates leaks and burst hoses, so it's worth spot-checking annually as part of your preventive plumbing maintenance routine.
Where to Store Your Kit & When to Call a Pro
Best Storage Location
Store your emergency plumbing kit as close to your main indoor shut-off valve as possible, typically in a basement, garage, or utility room. Make sure every adult in your household knows exactly where it is. Label it clearly: "PLUMBING EMERGENCY KIT" in bold letters. Following an annual plumbing maintenance schedule is a great time to also check your kit contents.
Also keep a laminated card in the kit with:
- Your home's main indoor shut-off valve location
- Your local emergency plumber's phone number
- The curb shut-off key location
- The main electrical breaker location (for wet-area shutoff)
When to Put Down the Wrench and Call a Pro
DIY plumbing tools are powerful for first-response damage control, but they have limits. Our emergency plumber decision guide breaks down what qualifies as a true emergency versus a DIY fix. For pipe-specific issues, the burst pipe repair guide walks through both immediate response and long-term cost expectations.
Call a licensed plumber immediately if:
- The leak is inside a wall, ceiling, or floor
- You have a sewer backup or detect foul odors from multiple drains
- Water pressure has dropped suddenly across the whole house
- A water heater is leaking or has failed
- Your DIY fix isn't holding or you're unsure of the source
- There's any risk of electrical hazards near standing water
- Water pressure exceeds 60 to 70 psi (temporary seals often fail above this)
Frequently Asked Questions
How much does it cost to build an emergency plumbing kit in 2026? A well-stocked emergency plumbing kit typically costs between $80 and $160 to build from scratch in 2026. You may already own several items like a bucket, screwdrivers, or a flashlight, which can reduce that cost significantly. Prioritize the shut-off key, pipe repair clamps, epoxy putty, and both types of plungers if you're building on a budget. These four categories cover the most common and most costly emergencies.
Can epoxy putty fix a burst pipe permanently? No, epoxy putty is strictly a temporary solution. Building codes expect damaged pipe or fittings to be repaired or replaced with approved materials rather than left with a patch. It's not rated for long-term use under sustained water pressure, especially above 60 to 70 psi. The underlying cause of the burst, whether corrosion, freezing, or excessive pressure, must still be addressed by a licensed plumber. Our burst pipe repair guide covers permanent fixes in detail.
What's the difference between a cup plunger and a flange plunger? A cup plunger has a flat rubber cup and works best on flat surfaces like sinks and tub drains. A flange plunger has an extended rubber sleeve (the "flange") that fits into a toilet's drain opening for a proper seal. Using a cup plunger on a toilet is one of the most common plumbing mistakes, and it simply can't create enough suction to clear the clog effectively. Keeping both types in your kit ensures you're ready for either situation.
Where exactly is the main water shut-off valve in my home? Most homes have two shut-off points: an indoor main valve (often near the water heater, in the basement, or in a utility closet) and a curb-side valve at the street-level water meter (which requires a shut-off key to operate). You should locate and test both before an emergency happens. Walk your family through both locations so anyone home during a plumbing crisis knows exactly what to do. Our detailed shut off valve guide covers exact locations for every foundation type.
Are smart leak detectors worth adding to my emergency kit in 2026? Yes, for most homeowners. Basic Wi-Fi leak sensors now cost $20 to $50 each and send phone alerts the moment they detect moisture, often catching hidden leaks days or weeks before they become emergencies. Pairing them with an automatic smart shutoff valve like Flo by Moen can prevent thousands of dollars in water damage while you're away. Consider seasonal risks too, like the freeze-related issues covered in our winter plumbing tips guide.
How often should I check or update my emergency plumbing kit? Do a quick inspection of your kit once a year (the same time you check your smoke detectors is a good rule of thumb). Replace any dried-out or hardened epoxy putty, check flashlight batteries, inspect rubber gloves for cracks or deterioration, and verify that your plumber's tape and silicone tape haven't dried out. Also confirm that your emergency plumber contact info is still current. A kit that's stocked but not maintained may fail you at the worst possible moment.