What Is Water Heater Sediment Buildup?
Sediment buildup occurs when dissolved minerals in your water supply, primarily calcium and magnesium, separate from the water during the heating process and settle as a solid layer at the bottom of your tank. Over time, this mineral residue hardens into what is commonly called limescale or scale. Sand, silt, and rust particles carried in from municipal lines or private wells can also contribute to the accumulation.
Hard water is the biggest driver of sediment buildup. The harder your water (meaning the higher its mineral concentration), the faster sediment forms. According to U.S. Geological Survey data, hard water affects roughly 85% of U.S. homes, leading to scale buildup, appliance inefficiencies, and costly plumbing maintenance, making this a widespread problem for the majority of water heater owners nationwide.

Find Trusted & Licensed Plumbers in Ohio
Get matched with companies for your specific needs
Signs of Sediment in Your Water Heater
Recognizing the symptoms early can save you from a premature and costly replacement. Here are the most common signs of sediment buildup:
Rumbling, Popping, or Hissing Sounds
One of the earliest and most recognizable symptoms is unusual noise. When sediment layers trap water beneath them, that water boils and forces steam bubbles through the crust, producing loud rumbling, popping, banging, or hissing sounds during heating cycles. If your water heater sounds like a percolating coffee pot, sediment is almost certainly the cause.
Reduced Hot Water Supply and Longer Heating Times
Sediment physically occupies space inside your tank, effectively reducing its capacity. The insulating layer also forces your heating element or burner to work much harder and longer to bring water to temperature. You may notice that hot water runs out faster than usual, or that it takes significantly longer to reheat.
Discolored or Rusty Hot Water
Brownish, cloudy, or metallic-tasting hot water coming from your taps is a warning sign that sediment has begun corroding the interior lining of your tank. This stage indicates the problem has advanced beyond a simple efficiency issue.
Rising Energy Bills
Because sediment acts as an insulating barrier between your heat source and the water, your unit burns more fuel or electricity to compensate. Even a thin layer of scale can measurably increase energy consumption and drive up your monthly utility bills.
Signs at a Glance
| Symptom | What It Signals |
|---|---|
| Rumbling / popping noises | Active sediment layer trapping water |
| Running out of hot water faster | Tank capacity reduced by sediment |
| Lukewarm or inconsistent temps | Heating element buried under buildup |
| Rusty or discolored hot water | Internal corrosion from advanced sediment |
| Higher energy bills | Heater working overtime to fight insulation layer |
| Leaking pressure relief valve | Excess pressure from overheating |
How to Remove Sediment: DIY Flush vs. Professional Service
DIY Water Heater Sediment Flush
Flushing your water heater is a manageable DIY task for most homeowners. Here is a step-by-step overview:
- Turn off the power or pilot. Shut off the circuit breaker for electric units, or set a gas unit to "pilot" mode.
- Close the cold water supply valve. This stops fresh water from entering the tank.
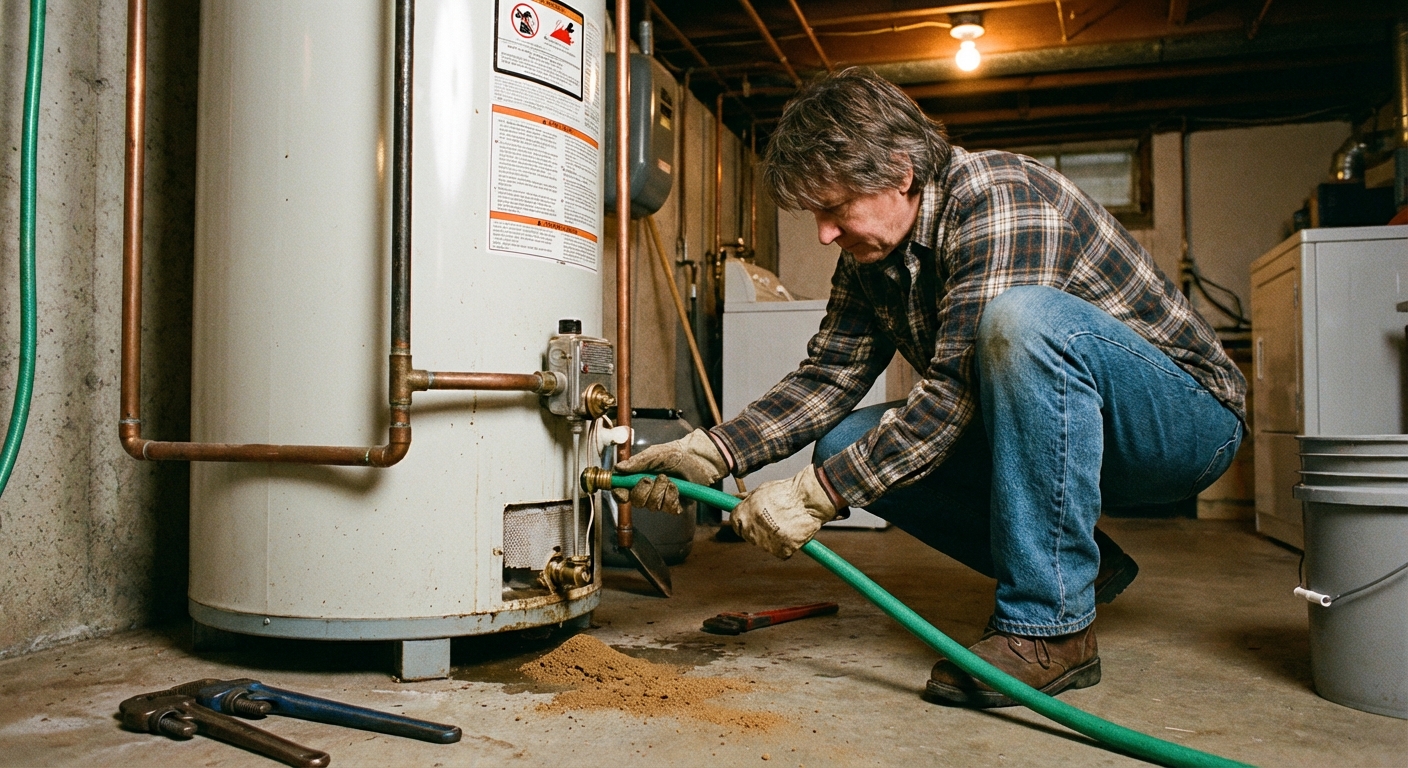
- Connect a garden hose to the drain valve at the base of the tank and run it to a floor drain, bucket, or outdoors.
- Open a hot water faucet somewhere in the house to allow air in and prevent a vacuum from forming.
- Open the drain valve and allow the tank to empty completely.
- Flush with cold water bursts. Briefly open the cold water supply in 15 to 20 second intervals to agitate and dislodge remaining sediment. Repeat until the water runs clear.
- Refill the tank. Close the drain valve, remove the hose, and open the cold water supply until water flows steadily from the open hot faucet.
- Restore power or relight the pilot after confirming the tank is full.
Professional Sediment Removal Service
If your water heater has heavy buildup, a stuck drain valve, or you're not comfortable with DIY plumbing, a professional flush is a smart investment. A plumber will also inspect the water heater anode rod, check for corrosion, and assess the overall condition of the unit.
Based on 2026 pricing data:
| Service Type | Typical Cost Range (2026) |
|---|---|
| Standard tank flush (30–50 gal) | $75 – $150 |
| Large tank flush (60–80 gal) | $180 – $250+ |
| Tankless water heater flush | $150 – $350 |
| Full maintenance visit (incl. flush) | $169 – $386 |
Professional water heater flushing costs between $110 and $200, with most homeowners spending around $160 for the service. Many plumbers charge by the hour, averaging $45 to $200, depending on experience and scope, and most flush jobs are completed in one to three hours.
If you notice your water heater is leaking around the tank or valves, don't attempt a DIY flush. Call a professional immediately, as this may signal advanced internal damage.
How Often Should You Flush?
Most experts recommend flushing once a year, or every six months if you have hard water or heavy use. Rumbling sounds, rusty water, or reduced hot water flow signal it's time to flush or call a professional if you're unsure.
- Standard recommendation: Once per year for most households
- Hard water areas: Every 6 months
- Soft water or filtered supply: Every 1 to 2 years
- Tankless heaters: Every 1 to 2 years (every 6 to 12 months in hard water)
Check your owner's manual for model-specific guidance, and always flush more frequently if you hear noises or notice reduced performance.
How to Prevent Water Heater Sediment Buildup
Prevention is far cheaper than repair. These strategies can dramatically slow or stop sediment accumulation before it becomes a costly problem.
1. Install a Water Softener
A water softener is the single most effective long-term solution for preventing sediment. It works through ion exchange, replacing calcium and magnesium ions with sodium ions that don't form scale deposits. With softened water entering your heater, mineral precipitation is dramatically reduced, extending the life of both the tank and heating elements. For a deep dive on your options, see our guide to hard water treatment options.
2. Maintain Your Anode Rod
The anode rod is a sacrificial metal rod (typically magnesium or aluminum) inside your tank that corrodes preferentially to protect the steel tank walls from rust. When the anode rod is depleted, the tank itself becomes vulnerable to corrosion, which accelerates sediment-related damage. Inspect your anode rod every 2 to 3 years and replace it every 3 to 5 years depending on water quality and usage. Learn more about anode rod replacement to significantly extend your unit's lifespan.
Note: If you install a water softener, switch to an aluminum-zinc anode rod or a powered anode, as soft water can accelerate the depletion of standard magnesium rods.
3. Set the Right Water Temperature
Keep your water heater set between 120°F and 140°F. Temperatures above 140°F accelerate mineral precipitation and sediment formation. The 120°F range is the sweet spot: hot enough to kill bacteria, cool enough to slow scale buildup.
4. Control Water Pressure
If your home's water pressure exceeds 50 PSI, consider installing a pressure reducing valve (PRV). High pressure speeds up sediment formation and puts extra stress on your tank and plumbing connections.
5. Install a Whole-House Sediment Pre-Filter
A whole-house sediment filter captures sand, silt, rust, and grit before they ever reach your water heater. This is especially valuable for homes on well water or in areas with aging municipal infrastructure.
| Prevention Method | Estimated Cost (2026) | Effectiveness |
|---|---|---|
| Annual DIY flush | $10–$20 | High |
| Water softener (installed) | $1,200–$3,800 | Very High |
| Anode rod replacement | $20–$50 DIY | High |
| Pressure reducing valve | $50–$200 installed | Moderate |
| Whole-house sediment filter | $100–$500 installed | Moderate–High |
Most homeowners pay between $1,200 and $3,800 installed for a water softener in 2026, with a national average installed cost around $1,500, based on updated 2026 industry data.
Frequently Asked Questions
How do I know if my water heater has sediment buildup?
The most telling signs are unusual noises (rumbling, popping, or hissing), reduced hot water supply, longer heating times, fluctuating water temperatures, discolored or rusty hot water, and unexplained increases in your energy bill. If you're experiencing more than one of these symptoms simultaneously, sediment buildup is very likely the cause. Knocking lightly on the side of the tank can also help, since a heavy, dull sound near the bottom often indicates a thick sediment layer.
Can sediment actually damage my water heater?
Yes, significantly. Sediment acts as an insulating barrier that forces your heating element or burner to overheat in order to compensate. This chronic overheating creates excess pressure, causes stress fractures, accelerates internal corrosion, and can eventually lead to tank leaks or rupture. Left untreated, sediment is one of the leading causes of premature water heater failure. Learn more about water heater leaking issues that can stem from long-term sediment damage.
When does sediment damage mean I need to replace my water heater?
If flushing fails to resolve symptoms, or if you notice leaks around the tank, cracks in the tank body, persistent rust-colored hot water, or a failing pressure relief valve, replacement is likely necessary. Traditional tank water heaters last 8 to 12 years, while tankless models can serve for 15 to 20 years, but severe sediment can cut that lifespan nearly in half. If your unit is already over 10 years old and showing these symptoms, replacement is often more cost-effective than continued repairs, with typical installed replacement costs ranging from $1,800 to $3,500 in 2026.
Is it safe to flush an old water heater myself?
Flushing is generally safe for most homeowners, but there are caveats with older units. On heaters that have never been flushed, a corroded drain valve may crack or fail during the process. Additionally, disturbing years of compacted sediment can sometimes cause a previously "sealed" leak to open. If your water heater is more than 10 years old and has never been serviced, it's wise to have a professional perform the first flush so they can assess the unit's overall condition at the same time.
Does a water softener eliminate the need to flush my water heater?
A water softener dramatically reduces sediment buildup by removing the calcium and magnesium that cause scale, but it doesn't eliminate the need for flushing entirely. Small amounts of residual sediment, sand, or silt can still accumulate over time. With a softener installed, you can safely extend your flushing interval to every 1 to 2 years rather than annually. Regular anode rod inspections remain important as well, since softened water can actually accelerate anode rod depletion.